The best real estate listing photography tips for mobile
Need to take real estate photos on the go? Set yourself up for success with these tips for better mobile photos.
Of the close to 2 trillion photos taken in the U.S. each year, 85% of them were taken on smartphones. Thanks to enhanced technology in the mobile photography arena, you don’t have to own an expensive camera to take stunning pictures.
However, this doesn’t mean that a simple point and click is going to get you the perfect shot each time. Photography is an art form, and we won’t diminish the skill set it requires.
But we also won’t say that a professional photographer is required every time you need real estate pictures taken. Sometimes when you’re in a bind, or looking to save some money, a smartphone can deliver exactly what you need.
But before you go aiming that iPhone into direct sunlight, give these 15 tips for optimum mobile photography a read.
1. Favor natural light
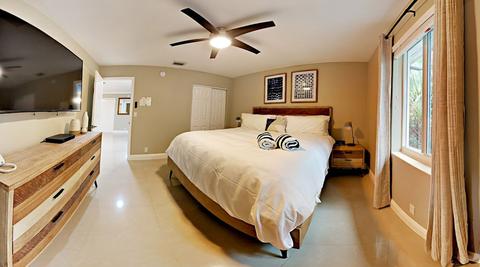
Natural light is exactly what it sounds like. When shooting indoor photos, you want to bring as much brightness to your photos from sun flooded rooms and open windows.
It creates a favorably, airy quality to photos, as well as gives you a degree of consistency throughout your shoot. Natural light will help you to achieve an authenticity to your images that viewers looking on your website or social media will appreciate.

2. Always stage your set
When you have a showing scheduled, do you just leave the house as is, clutter and all? Odds are you don’t, because mess and clutter don’t sell a house.
Just because you’re shooting photos on your phone doesn’t mean you should give your set any less attention than you would give a professional photo shoot.
Before you take your photo, be sure to move distracting objects out of the way as well as any personal paraphernalia. Your space should be a blank canvas, with the focus on the space.
💡 Bonus Tip: Make sure when you’re staging the photo that you get rid of any items that blatantly give away the time the pictures were taken: like a Christmas tree or jack-o-lantern.
People should feel like they’re getting a fresh look at the property when they view the pictures, and by dating your photos like that, people may feel turned away by their (less than) timeliness.
3. Include wide angle shots
Wide angle shots give your property more depth while still concentrating on your focal points. Additionally, you may need a broader focus if you’re capturing a large space, and a wide angle is the best way to capture that.
According to the experts at Ricoh Imaging, “decreasing the aperture diameter further improves depth of field, creating a pan focus image focused on the entire range. This is another benefit of wide-angle lens photography, and just one of the many choices wide-angle provides.”
Some smartphones feature a wide angle setting, but if you’re looking for something a little extra, you can purchase a lens to go over your smartphone camera, giving you the perfect wide angle shot.
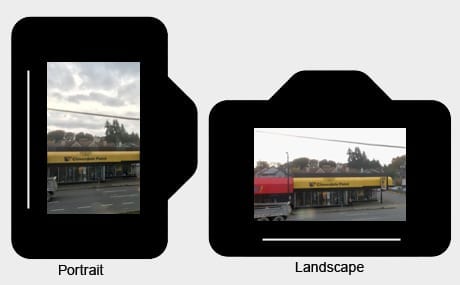
4. Shoot in landscape
When you’re taking a photo on your cellphone, you have two choices on how to hold the device: portrait or landscape.
It’s better to shoot in landscape (when your phone is horizontal opposed to up and down) as it gives you a wider photo.
Similar to the need for wide angle shots, the landscape approach is closer to the kind of shot you would get on a high-end camera.
5. Blend exposures
When you’re shooting on a smartphone, you may not have as much control over the lighting. This may result in a series of photos lighter and darker than one another.
To help deliver a consistent collection, download an app that allows you to blend exposures. Exposure blending involves the mixing together of all the colors and lighting options from each photo (both natural and artificial) to create one, perfect lighting for all photos.
If you’re not feeling confident in your photo editing abilities, you can also invest in editing presets. These one click editors can give your photos a consistent finish.
If you’re heavily involved in a photo-heavy social media platform like Instagram, presets can also help give your feed a beautiful, cohesive theme.
6. Time your shoot during golden hour
Any amateur photographer who doesn’t have lighting equipment in their arsenal always has Golden Hour as their silver bullet tool.
Also referred to as magic hour, it’s the period of time that occurs during sunrise and sunset when the sun is hovering around the horizon.
The effect of shooting during golden hour is a bright, yet soft, light that floods nearly every space with an ideal amount of exposure that can be captured even by a lower resolution phone camera.
7. Take your photographs like you’re walking through the space
One distinct advantage mobile photographers have is how natural it is to take your phone along with you everywhere. When it comes to real estate photography, potential buyers respond best to images orientated as if they themselves are walking through the space.
So, use your mobility to find the spot in each room that gives you the most accurate perspective of someone who was just entering the space. A people’s eye view!
8. Invest in a tripod
One of the most obvious tips for better mobile photography is to avoid blurry images. We didn’t want to pander you with that tip, so instead we’ll suggest one of the best ways to keep your hands steady and avoid blurry pictures.
All you have to do is invest in a tripod. There are small, mobile-friendly tripods on the market that can fit in a small bag and join you on all your visits. Simply take it out, prop them up, and get a steady photo every time.
9. Make sure all artificial lighting is consistent
We’ve already made our preferred stance on natural light clear, but sometimes it’s just not an option (like in a basement).
In order to make sure your pictures look better with the artificial lighting available, make sure all the lightbulbs are the same kind, and of equal brightness.
For example, change any bulb that looks like it’s on its way out. And check the brand so you don’t have an LED, standard, and compact fluorescent all lighting up the same ceiling panel.

10. Switch off the flash
Every phone has the option to turn the flash on or off, we suggest you ensure your flash is switched off. When your mobile camera sets off a flash, it’s only capable of making the first few feet of your photo bright, and everything else behind is very dark.
While flash has improved on phones over the years, it still isn’t up to the level of a high end DSLR. So it’s best to avoid it all-together.
11. Tap to refocus
Most smartphone cameras have a focus feature triggered by tapping your screen. When shooting a room, your best hack is to focus your lens on a small feature or piece of furniture, then tap your screen once on the farthest point of the room.
This will make sure that your entire room is in focus. Be patient and watch your screen, because tapping twice could tip your exposure too bright or too dark!
12. Create depth with your photos
Creating depth in your photos is the easiest way to make an image more interesting for a viewer. A quick way to do this on your phone is to get higher and angle your device down for a more aerial perspective (vs. head on). This creates a bolder, more dynamic photo.
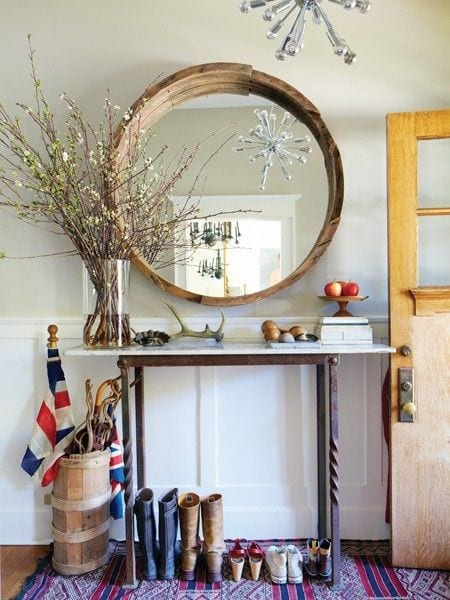
13. Check your mirrors
Make sure you’re not taking a selfie! Check your mirrors and make sure you (and your phone) are out of the shot. A small, simple tip, but one that can easily be overlooked given how natural a mirror photo is for some folks!
14. Minimize the street in exterior shots
Most realtors are in agreement, showing too much of the street in an exterior shot can make the image feel more aloof and less homey.
With a mobile phone, however, you have to get pretty far away from the house to get it all in the frame. Instead of zooming in (which can decrease the quality of a photo) opt to crop the photo after you take it. This will result in a cleaner and clearer photo.
15. Keep your photos real
Our final tip is more of a reminder. The purpose of these pictures is to sell. And unless you want an unhappy customer who feels duped when they see a property in person, take photos as close to reality as possible. Avoid any fun filters or other neat mobile tools.
We’ll close this piece out with one final thought… The best mobile listing photos are the ones that leave people saying, “what kind of camera did you take this on!?”
Follow some of these tips, and you’re sure to elicit that question more than once.
This article was published on May 20, 2019, by Meghan Tocci, and was updated on August 4, 2023, by Dani Henion. Nathan Ellering also contributed to this piece.