How to Build a Simple SMS Chatbot Without Writing Code
Even if you're not a developer, it's still possible to create a simple SMS chatbot. Follow this step-by-step guide to find out how. No Python required!

Even if you're not a developer, it's still possible to create a simple SMS chatbot. Follow this step-by-step guide to find out how. No Python required!

If you’re looking for an employee who’s always efficient, never gets tired or sick, passes up on vacation days, and follows directions—you’re probably thinking of a chatbot.
Chatbots need little introduction. Everyone from Forbes to Entrepeneur.com are talking about how they’re the future. For good reason too. Studies show they cut down operational costs and save valuable time. Still, for those who may be new to the world of chatbots, we’ll quickly explain:
An SMS chatbot or a text bot is a software tool that automatically responds and sends text messages to users who communicate with the bot. A text bot can help to create an interactive marketing channel that improves customer communication, send mass text messages, improves customer conversion rate, and more.
If you’re small business, you may not have the resources to develop your own chatbot.
There are some turn-key solutions out there like Intercom, but few that are SMS-based. Because SMS messaging is native to every cellphone, it’s the channel most consumers prefer for receiving customer service.
We’re going to show you how to build a SMS-based chatbot without writing a single line of code. That’s right. No need for Twilio. No need to read a single API doc! All you have to sign up for is:
That’s it. Once you’re signed up for the two services above, we can begin.
First, you need to decide how you want to integrate chatbots into your customer experience. This will help guide the paths you create. Here are just a few of the things you can do with an SMS chatbot:
For this example, let’s keep things super simple. We’ll pretend we own a t-shirt company that wants to qualify leads. We have three main goals:
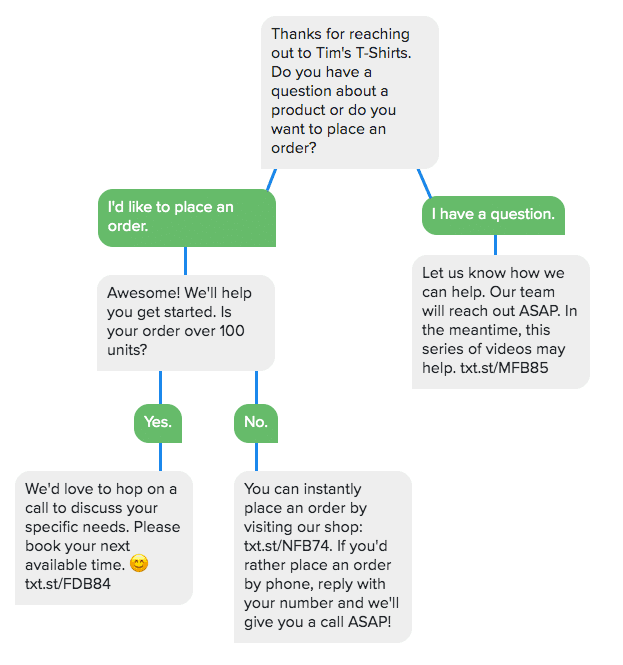
With these goals in mind, ask yourself what you want your SMS chat bot to do, then write up a conversation. A pen and paper can help this process. Sketch out a flowchart. Here’s what ours looks like:

Once you have the flow of your chatbot conversation planned, you’re ready to build it out. The first step is to connect SimpleTexting to Zapier. It’ll take 5 minutes, tops. Below are the main steps, or you can click here for a more detailed walkthrough.
1. Log in to Zapier
Click on Connected Accounts and search for SimpleTexting. You’ll be presented with a prompt asking for your Server URL and API key.
2. Get your API key from SimpleTexting
Log in to SimpleTexting, then go to the Apps section and scroll down until you find Zapier. Copy and paste the Server URL and API key into Zapier. Click Yes, Continue.
3. Go back to Zapier and Make a Zap
Your SimpleTexting and Zapier accounts are now connected. Time for the fun part. Click Make a Zap at the top right-hand corner of your Zapier account.
Here’s where everything comes together. This is where you tell Zapier, “Hey, if I get a text that says this, send a text that says this.” Again, we’ll go through it step-by-step.
1. Choose SimpleTexting as your trigger app
Then click New Incoming Message as the trigger. This is like telling Zapier, “Start the chatbot flow when I get a new text.” After you select the trigger, you’ll be asked to select your SimpleTexting account. Then click Continue.

2. Add a path
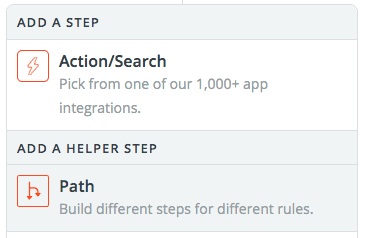
Click Add a Step then click Paths. This lets you use conditional logic to run different actions based on specific rules. So in human speak, “If this happens, then do that.”

3. Fill out your path details
If you took the time to create a simple flowchart, this next step should be pretty straightforward. Set the logic for your first path. In our example above, we want to trigger a specific message if someone wants to place an order so the logic for our first path will look like this:

4. Select Send SMS Message as your path action
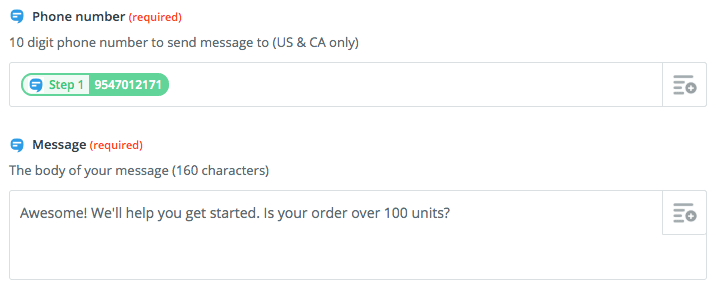
Let’s continue with our above example. If someone wants to place an order, we want to qualify them by asking if their order is above 100 units. We’ll select Send SMS Message as our action, then write out our text.

5. Set up your remaining paths
And that’s the basics of how you set up a path! Click Set Up Next Path and finish your chatbot. We’ll set up a path with the following logic:

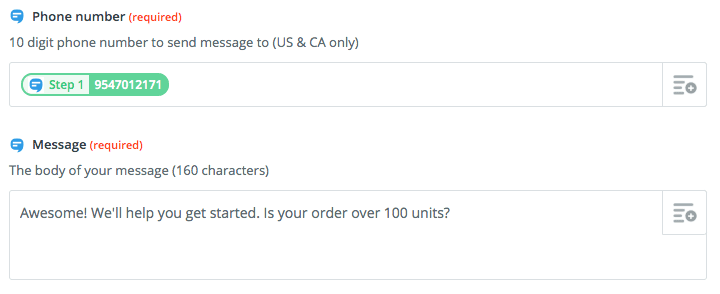
And just like the first path, we’ll then select Send SMS Message as our action and fill out the template:

The first part of your SMS chatbot is now complete! Set it live, then go ahead and test it out. To trigger the chatbot, you’ll need to opt-in for messages.
The easiest way to do this is to create a keyword and text it to a phone number.
You can then add a keyword to your calls to action: Want to get in touch with our team? Text TimsTshirts to (833) 602-8038! In this case, TimsTshirts would be the keyword that begins the chatbot flow.
As hope this article shows you that chatbots can be accessible, even to non-developers and small businesses. It goes without saying that this method of building chatbots isn’t perfect. There’s still a long way to go in developing easy-to-use machine learning and better natural language processing. But it’s coming, and getting early experience building chatbots will set your organization up for success in the future!
Alfredo is SimpleTexting's brand manager. He's passionate about using his 10+ years of marketing experience to help small businesses grow.
More Posts from Alfredo SalkeldAutoresponders ensure timely communication with your new subscribers or customers. Find out how they work.
ReadWe split a subscriber list in two and sent each half an identical campaign—only one had a photo and the other didn't. Here's how each campaign performed.
ReadStart a text marketing campaign or have a 1-on-1 conversation today. It's risk free. Sign up for a free 14-day trial today to see SimpleTexting in action.
No credit card required