More Blog Posts
Community text app: How to use our inexpensive alternative
If you’re searching for an affordable Community text app alternative, look no further.
If you’re searching for an affordable Community text app alternative, look no further.
Did you know that you can send text messages to your favorite celebrities and brands?
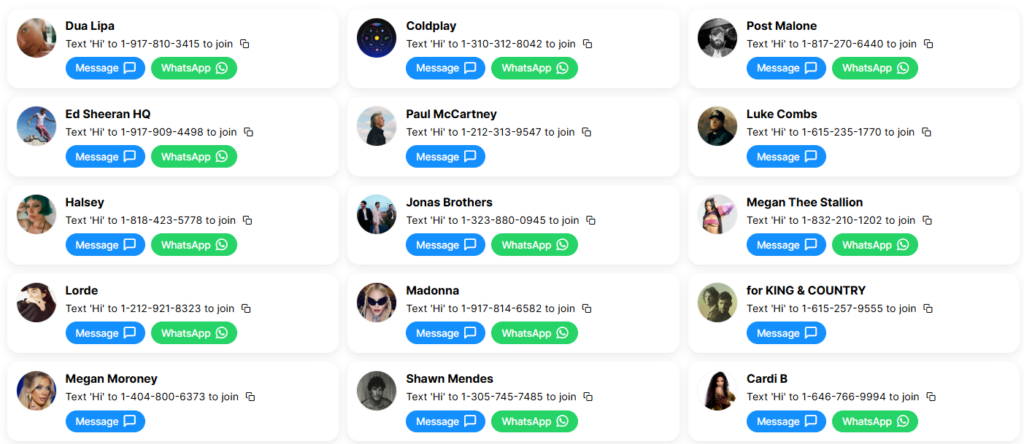
Let’s be clear: MTV isn’t texting these folks about its newest show using the same phone number. The numbers these celebrities are sharing come from the Community text app, which launched at the end of 2019.
You can find all sorts of brands, influencers, and celebrities sharing their numbers in Community’s directory. Look around and you’ll see names like Ashton Kutcher, McDonald’s, Paul McCartney, Gary Vaynerchuk, the Jonas Brothers, and Kerry Washington.
Given the benefits of texting, it’s no surprise that more and more celebrities, influencers, and brands want to text with their fans. The problem is that the Community app is secretive about its pricing, doesn’t have a free trial or simple sign-up, and is a little pricey for beginners.
So, if you’re searching high and low for an affordable and immediately available Community app alternative, look no further. In this article, we walk you through how to use SimpleTexting to text with your people.
If you’re not familiar with the nuts and bolts of the Community text app, it’s pretty simple. Celebrities, brands, and influencers advertise their phone numbers through social networks and ask fans to text them.
Fans send them a text message and immediately receive an automatic response asking them to click the link to fill out a web form. This form typically asks them for some personal information like their name and birthday.
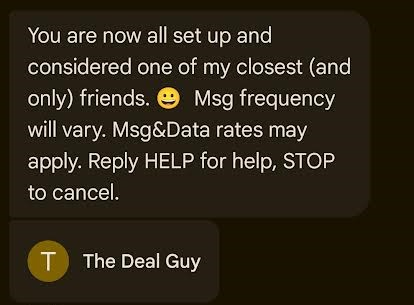
Once a fan fills out the form, they’ve subscribed to receive future text messages. Here’s an example of how it works with the discount expert The Deals Guy.

The Community app starts at $49/month. While this price is cheaper than its original cost of $99 per month, it’s still on the pricey side for independent creators and businesses.
The good news is that there are accessible alternatives. Below, we’ll show you how you can get the same results as the Community app with SimpleTexting (but for as low as $29/month with unlimited contacts).
Since SimpleTexting allows you to create custom confirmation messages with keywords and automated messages with autoresponders, you have a lot of creative control over your subscribers’ welcome experience.
Here are three ways to create a texting community in SimpleTexting, depending on how much information you want from your list members.
SimpleTexting offers an easier way for your community members to sign up for your list. All you have to do is reserve a specific keyword, and then your customers can text that keyword to your number to subscribe to future updates.
Community’s signature feature is its opt-in form, but you can create one with SimpleTexting, too. And instead of having to fill out the form to get your texts, your subscribers can choose to complete it if they want to give you extra info. It’s a win-win.
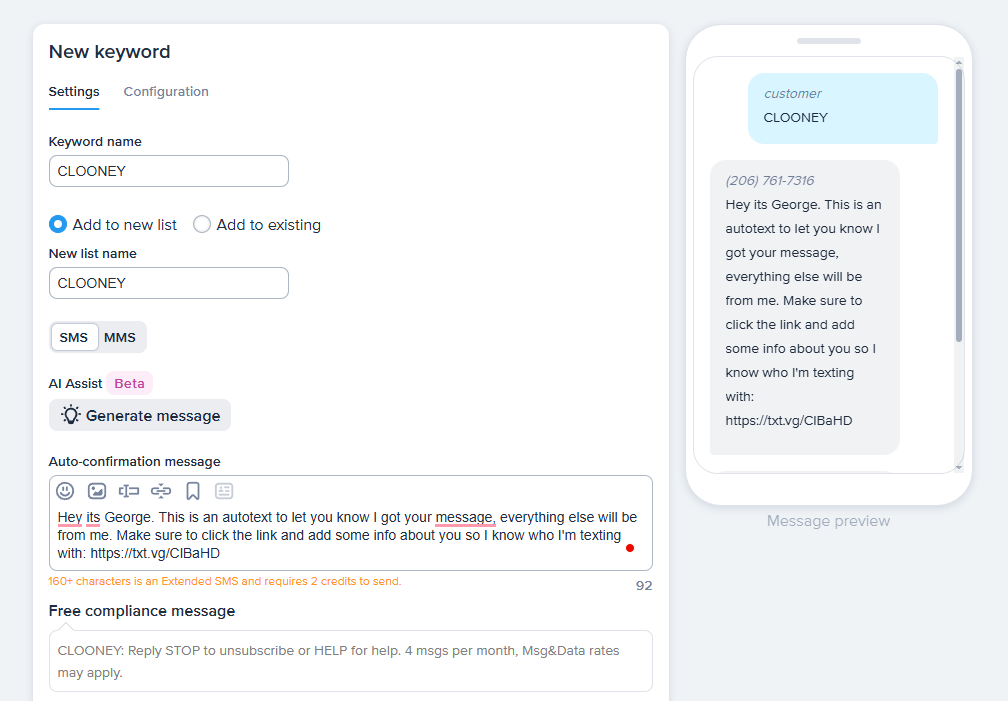
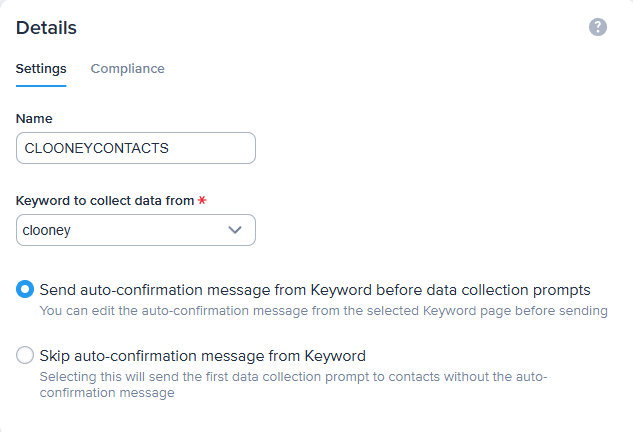
For example, if George Clooney wanted to text with fans, he could ask them to text in “CLOONEY” to receive future updates and to text directly with him.
CLOONEY
Hey its George. This is an autotext to let you know I got your message, everything else will be from me. Make sure to click the link and add some info about you so I know who I’m texting with: https://txt.vg/ClBaHD
When someone fills out the form, you could then segment your contacts based on their responses and add them to your email list.
And if you’re more focused on texting your fans over having them fill a form, you don’t have to include the link if you don’t want to.
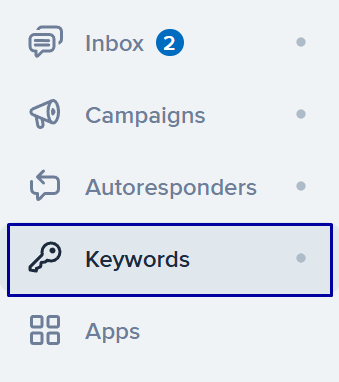
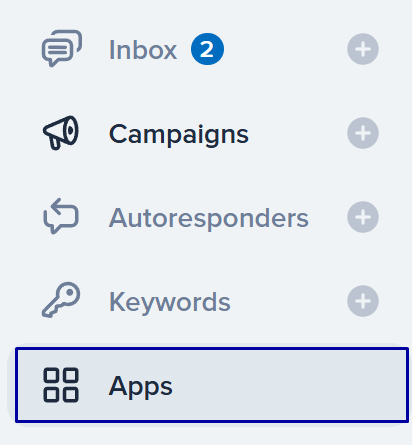
Let’s start with how to create a keyword. Go to Keywords in the left-hand menu in your SimpleTexting dashboard, then click New keyword.

Here, you’ll be able to choose the name of your keyword and write an auto-confirmation message. If you’d rather text your subscribers without the form, you can exclude the link, save your keyword, and finish here. Just ask your fans to text the keyword to your number.
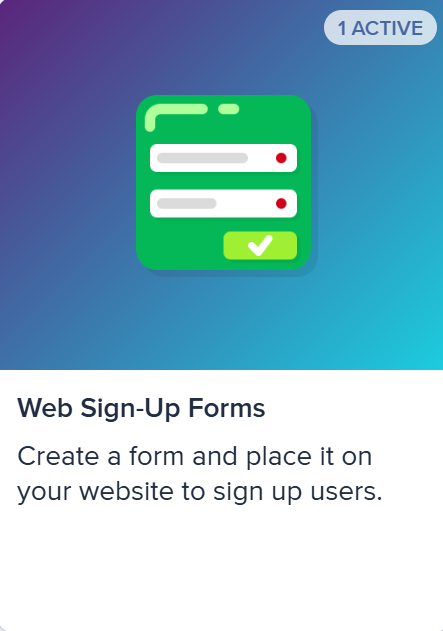
Now that you know how to make a keyword in SimpleTexting, you can make a sign-up keyword that includes a form by including the link to the form in your message. And SimpleTexting has a built-in form builder so you don’t have to leave the app.
Start creating your form by going to Apps in your SimpleTexting dashboard menu, then clicking Web Sign-Up Forms.
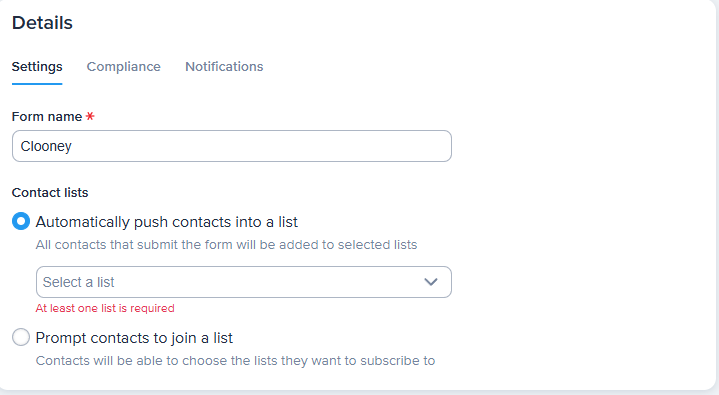
Here, you’ll name your form and choose whether contacts who complete the form automatically join a list or get a prompt to choose which list of yours to join. If you have a second subscriber list you’d like to have for fans who complete the form, you can choose it as the list to automatically add people to.
Below those options is the form builder, where you can click +Add field at the bottom to add another field, such as first name or email.
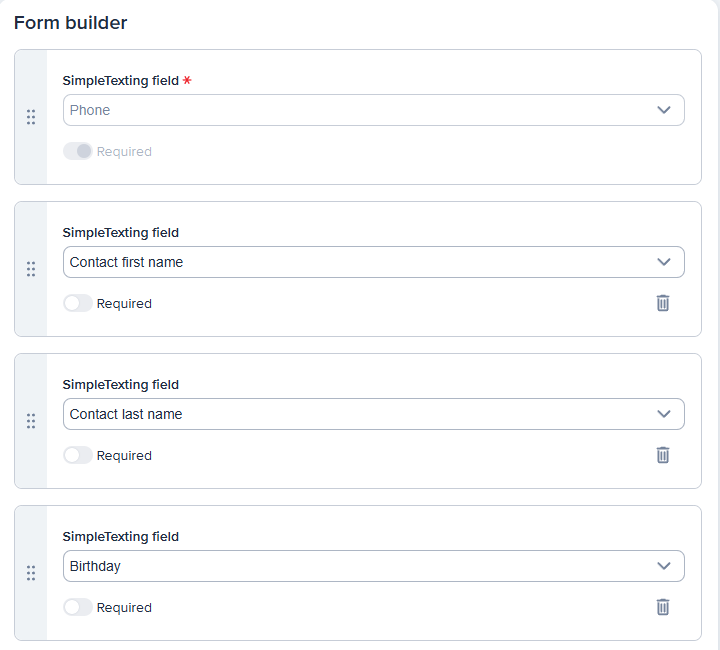
(Note: If you want to create custom fields, go to Contacts in the SimpleTexting dashboard menu, then Custom fields. They’ll appear as options in the form builder after you create them.)
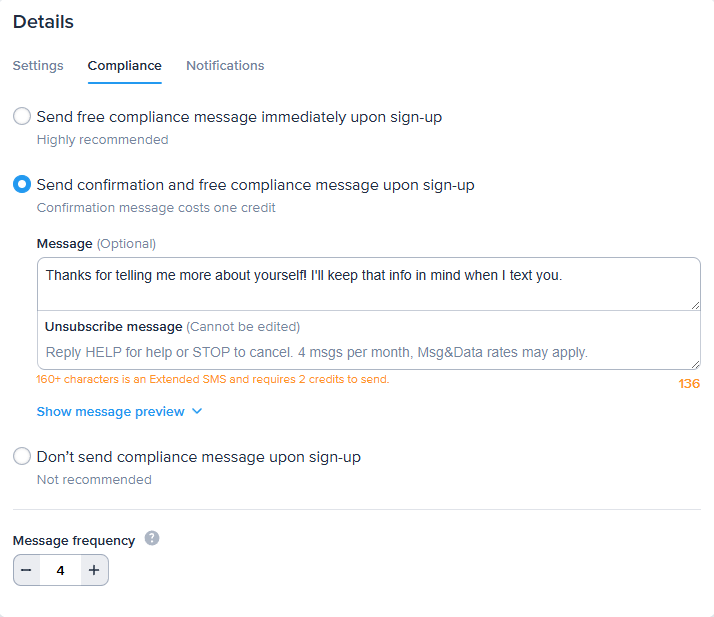
One more form builder option to keep in mind is the ability to customize your confirmation message. Click the Compliance tab, then choose Send confirmation and free compliance message upon sign-up to write a custom confirmation message, like so:
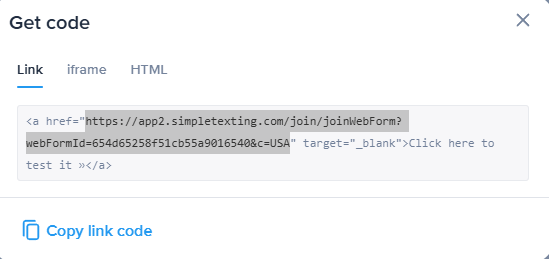
After you click Complete Form, SimpleTexting will take you to your list of forms. On that page, click Get Code in your list’s row to get the code for your form.
If you plan on putting it on your website, use the iframe or HTML code, then link to your website page in the keyword confirmation text you created in the first method. Alternatively, you can grab a direct URL to your form in the link code, as you can see highlighted in this screenshot:
You can make your community onboarding even more engaging using our data collection feature. Instead of using a form to get extra information about your subscribers, you can automatically ask them a series of questions in your text conversation with them. The information they share through their answers then becomes data in their SimpleTexting contact entries.
You can start creating a data collection sequence by going to the Apps option in your SimpleTexting menu dashboard again. But this time, you’ll choose Data Collection as your app.

Then, click the New data collection button in the upper-left corner.

In this menu, you’ll choose a name for your data collection sequence and the keyword you want to link it to.
From there, you can set up your prompts. This example just asks for a first name, but you can click +Add question at the bottom of this section to add as many questions as you need.
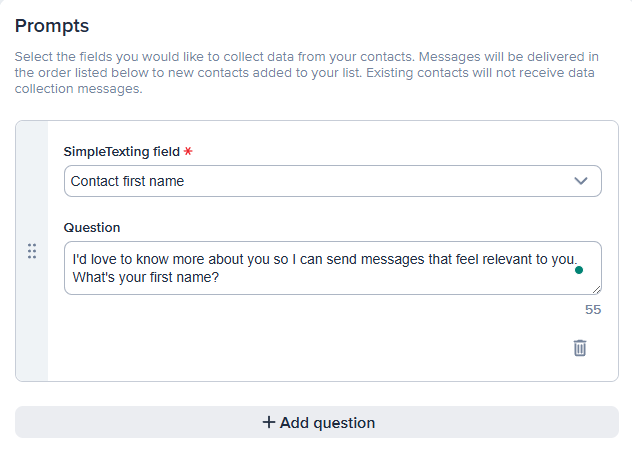
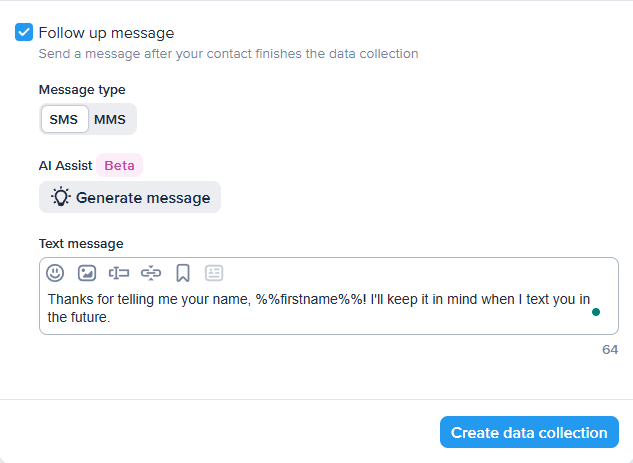
Check the Follow up message checkbox if you’d like to add a message to confirm that you’re done with your questions, then click Create data collection to set up your sequence. Here, you can click the Custom field icon next to the Media icon to add someone’s name – a personal touch.
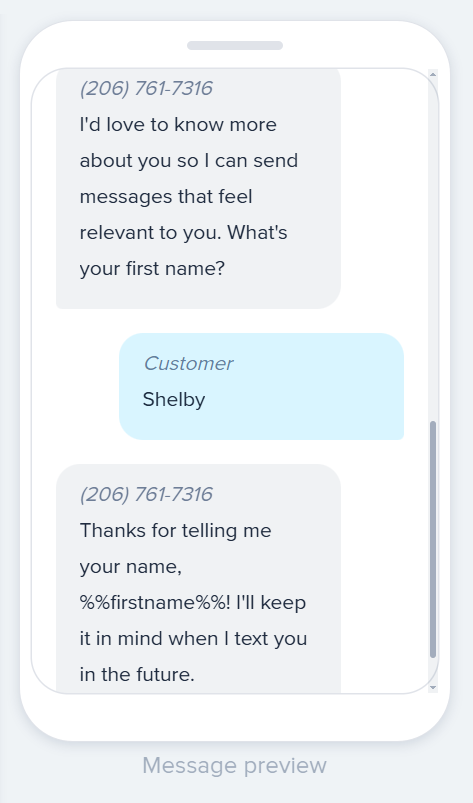
The final exchange should look something like this:
SimpleTexting has even more features to help you design a great fan experience after they join your community. Try some of these techniques:
It seems like fans are seeking something different than algorithmically organized feeds. As Wired once declared, private messages are the new (old) social network. And as Mark Zuckerberg stated, private messaging is by “far the fastest-growing area of online communication.”
So, why not get in on the trend and give your fans a more personal way to connect with you? Try our community texting tool for free and see how it can make a difference.
Drew Wilkinson is the Head of Marketing at SimpleTexting. Drew has more than a decade of experience managing successful integrated marketing programs to build brands, raise awareness, and generate demand.
More Posts from Drew WilkinsonStruggling to get students to open up about mental health? Learn how to create a digital safe space where they can reach out and get access to resources with SMS.
ReadUnsure of how to handle texting the wrong person? Use our guide to build the perfect follow-up text message.
Read


Start a text marketing campaign or have a 1-on-1 conversation today. It's risk free. Sign up for a free 14-day trial today to see SimpleTexting in action.
No credit card required