How to Back Up Text Messages
Whether you’re an iPhone or an Android user, you can use our steps below to back up your text messages in four different ways.
Whether you’re an iPhone or an Android user, you can use our steps below to back up your text messages in four different ways.

Hands up, who has lost or broken a phone in the last five years?
Us too.
While losing or breaking your phone is certainly inconvenient, it no longer has to be the end of the world.
Thanks to the cloud and backups, you can easily restore most of the content from your old phone on your new one.
Backing up your text messages means saving and storing them in the cloud. So in the case of an unfortunate event, you don’t need to panic about losing your contacts, photos or text messages.
On some devices, message backups are automatic. However, understanding and learning how to back up your text messages manually is vital to ensure you’ve got everything saved.
Let’s dig into how to back up your text messages on both an iPhone and Android device.
Even the most cautious person in the world can’t guarantee their phone won’t be lost, stolen or broken.
Phone backups are often the very last thing on our to-do list, because in the present moment it just isn’t necessary. All of the information is there. However, having a backup is crucial when the time does come to get a new phone.
From important information to messages from loved ones to simply the inconvenience of losing all conversation points – there are many reasons why you should back up your text messages.
Hopefully, we’ve managed to convince you. Depending on whether you have an iPhone or Android, there are different ways to ensure your conversations aren’t lost.
Use the steps below to back up your text messages on your cellphone.
You can back up your iMessages with or without iCloud. Here are two different ways you can save those conversations right now.
The good news is that Apple’s iCloud is ready and waiting to receive and save your messages. All you have to do is activate it.
iCloud only allows up to 5GB of storage, which means you may need to purchase an iCloud plan. These start at $0.99 for 50 GB and increase according to how much you need.
When you’ve bought your iCloud storage, you can take the following steps to back up your text messages:
1. Head to Settings on your iPhone or iPad.
2. Select ‘iCloud’.
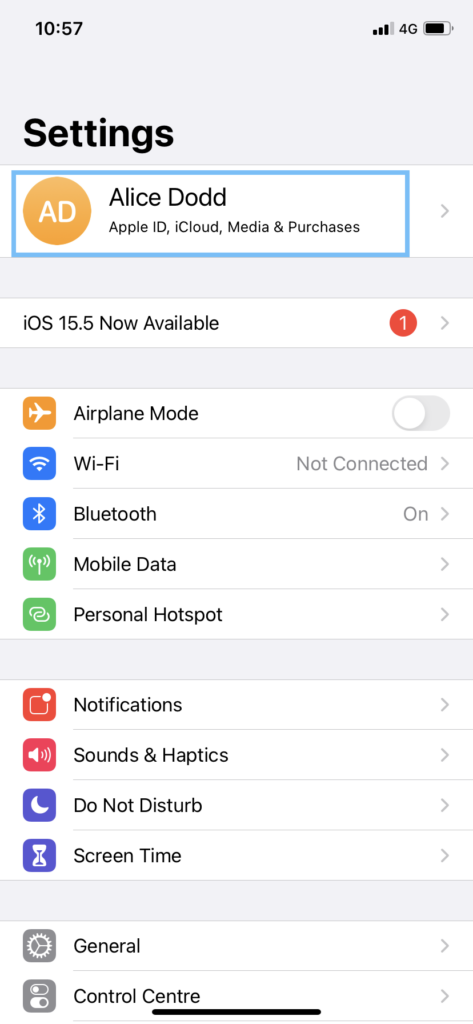
3. There are two ways to make sure your messages are backed up:
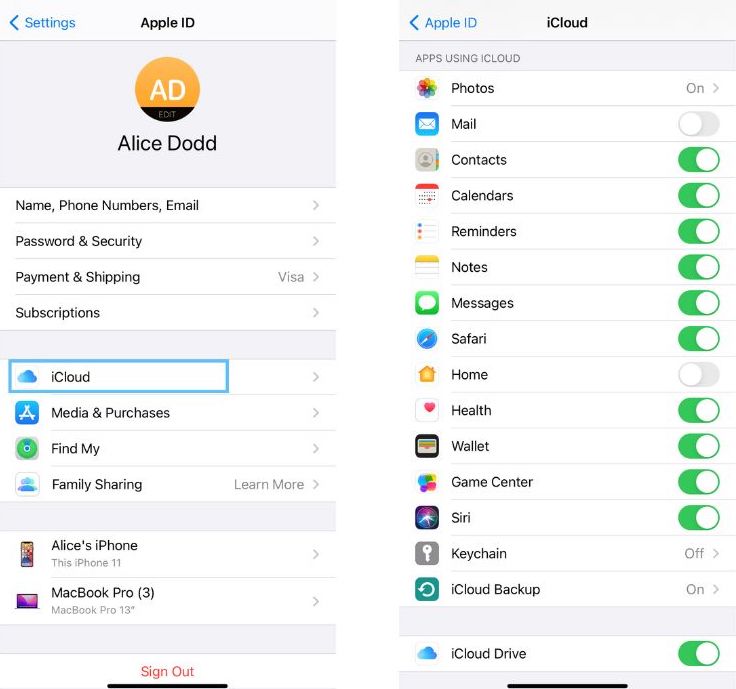


As soon as you do this, your phone will begin backing up your text messages!
It's possible to retrieve deleted text messages. Follow this step-by step guide to quickly and safely recover your texts. READ MORE
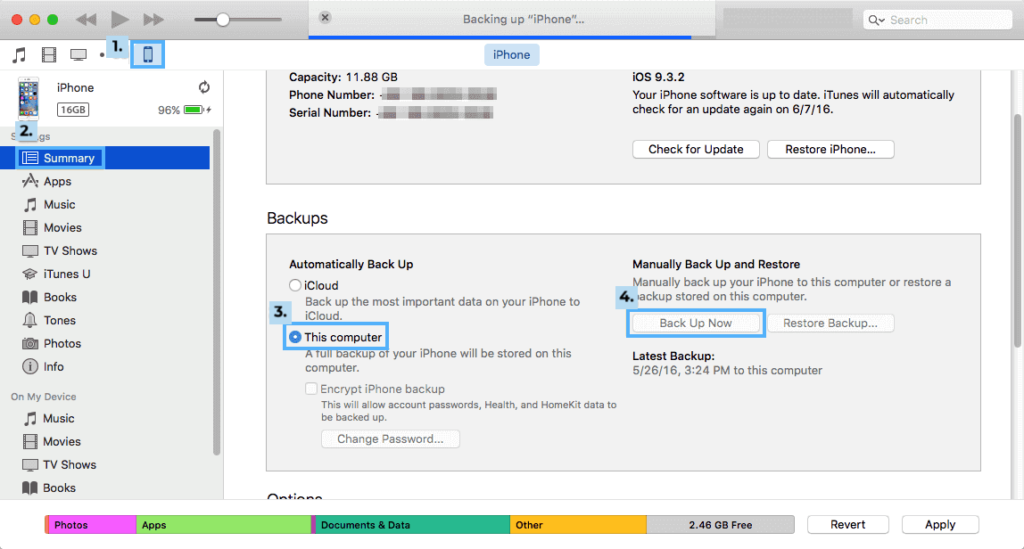
When you plug your iPhone into your computer, iTunes immediately appears. Believe it or not, iTunes is so much more than a music streaming app. It’s also a tool for backing up your entire phone.
If you’re only looking to back up your text messages, this option isn’t for you. But if you want your whole phone backed up, iTunes is a great way to do that.
Use a USB to connect your phone to your MacBook. Once iTunes is launched, follow these instructions.
You can use Google Drive or a third-party app to back up your text messages on android. Depending on your preference, follow the instructions below.
If you’re not an iPhone user, it’s just as easy to backup your text messages. Google has its own equivalent of iCloud, known as Google Drive.
Anyone who’s used a Google app at home or work should be familiar with Google Drive, your data is automatically saved in it.
Here’s how to make sure your phone is also connected to Google Drive so you don’t lose any messages.
1. Head to ‘Settings’ on your Android device.
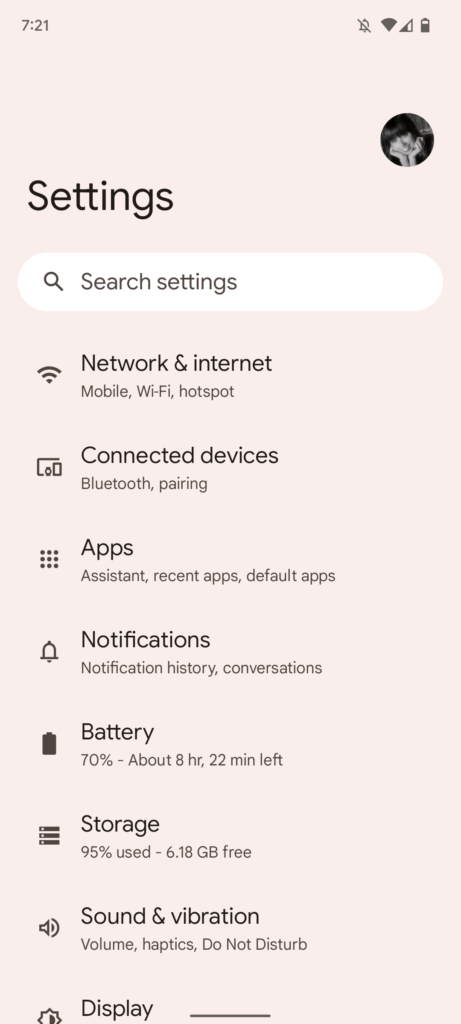
2. Scroll down to the bottom of the settings page and tap ‘Google’.
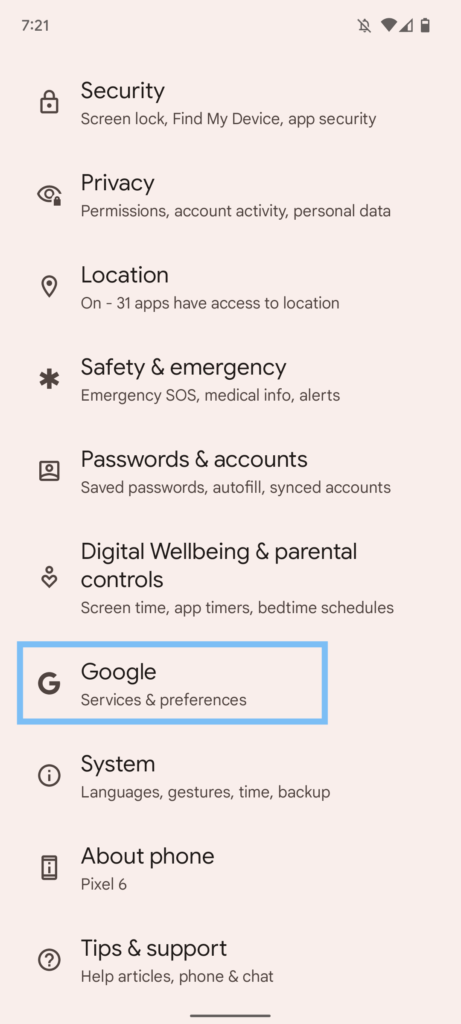
3. Select ‘Backup’.
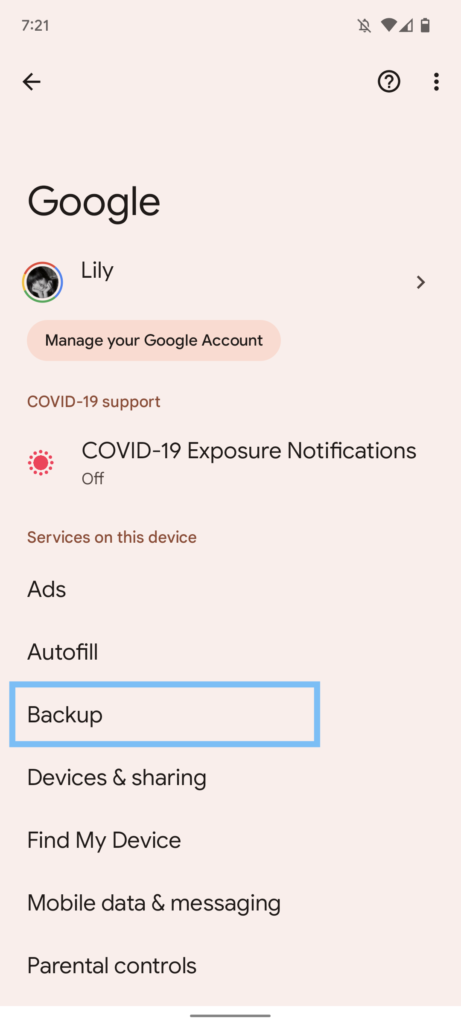
4. Select ‘Back up now‘.
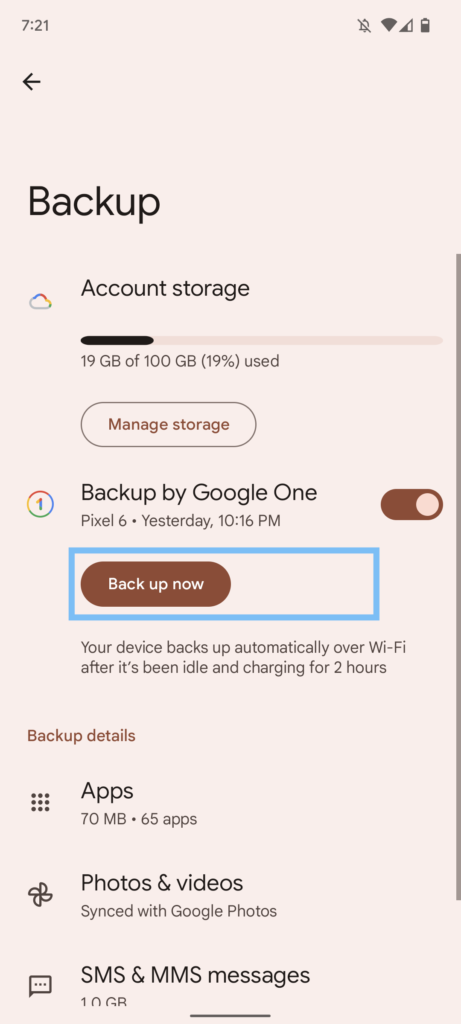
You can head to the main menu of Google Drive to find your backups.
If you log onto a new phone using the Google Account connected to the one you backed up, you’ll be able to access your messages.
If there’s a reason you would rather not use Google Drive – maybe you have a preference for OneDrive or DropBox – you can use a third-party app.
1. Go to the Google Play Store
Use the search bar to find a backup app like ‘SMS Backup and Restore’ (this is one popular option, but research and read reviews to see which app is right for you).
2. Open the app, and select ‘Get Started’.
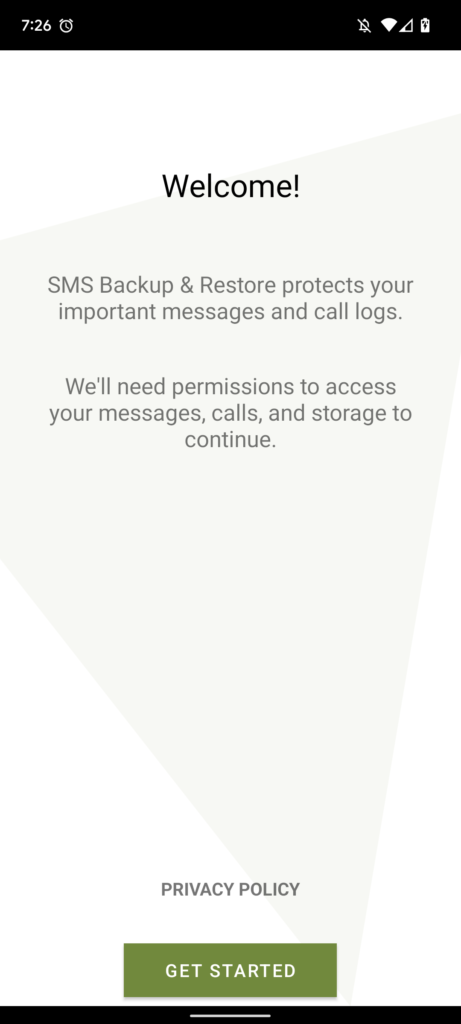
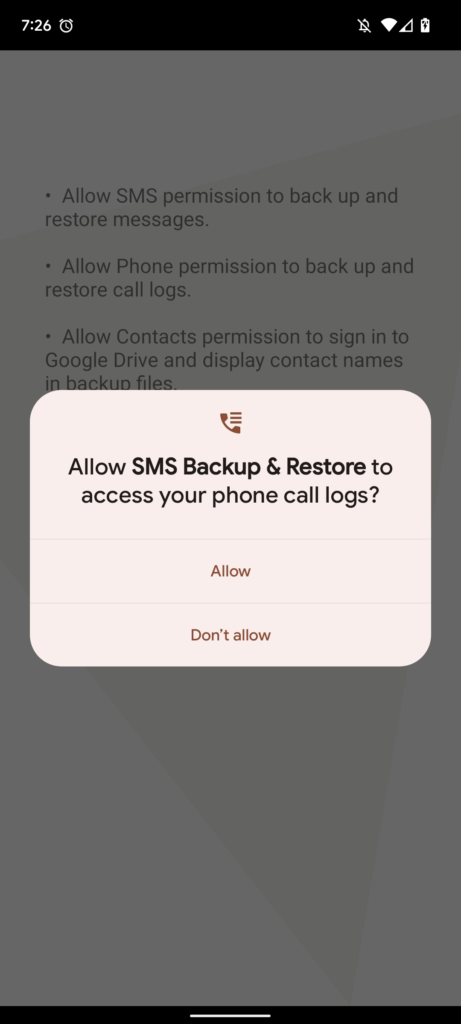
3. Accept permission for the app to access your phone information.
It will request access to contacts, make and manage phone calls, your phone call logs, access photos, media and files, and send and view SMS messages on your device.
You need to ‘allow’ these permissions in order for the backup to take place.
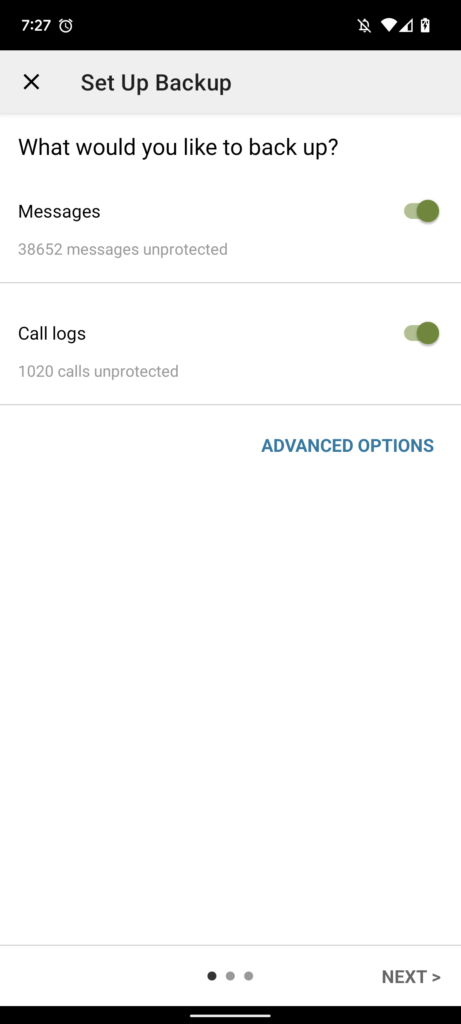
4. Select ‘Set Up a Backup’.
Confirm what backup you’d like to start (in this case, text messages.)
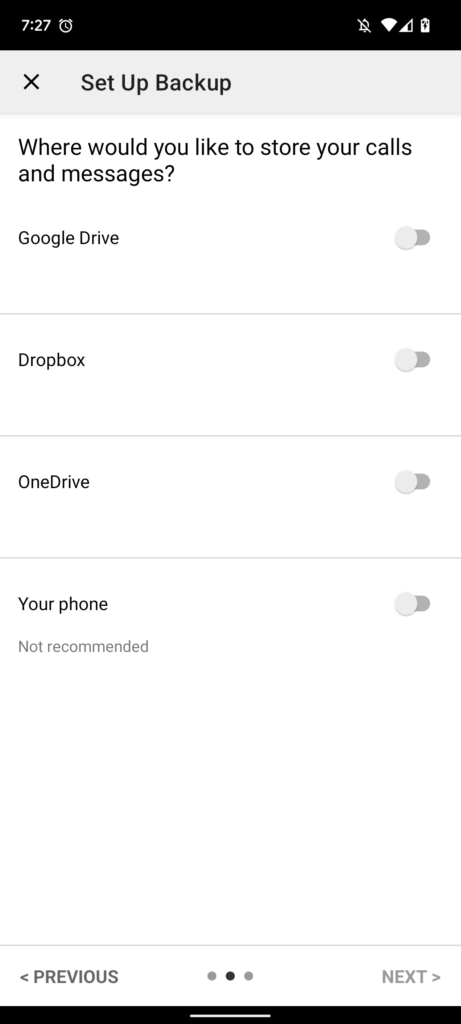
5. Decide where you want to store your data.
You can choose between Google Drive, OneDrive, and DropBox. You’ll then need to log in to your selected drive.
6. Choose how, when and how often to back up your text messages.
Once in, you can choose how often to delete backups whether to back up over Wi-Fi and how often you want your backups to occur.
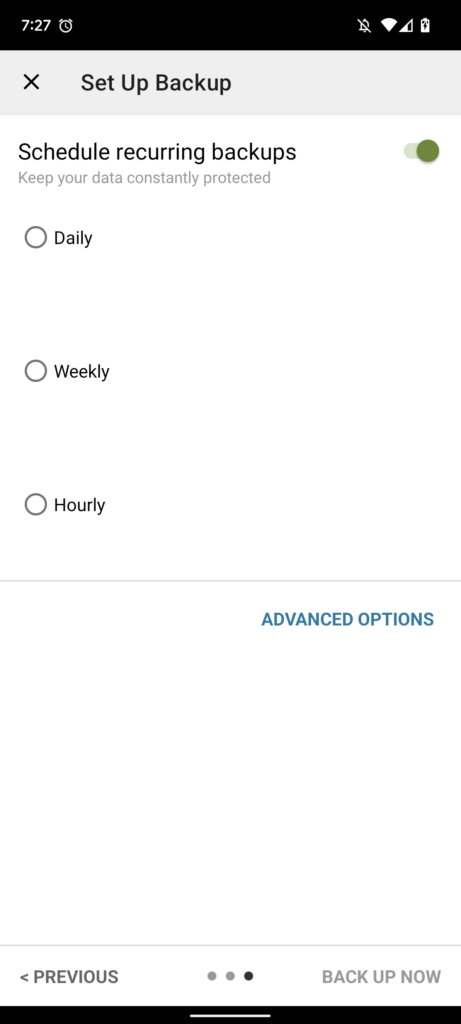
7. Select ‘BACK UP NOW’ in the bottom right-hand corner.

‘The cloud’, ‘Drive’, ‘Backups’: all jargon words that only had one meaning a decade ago. And none of those meanings had anything to do with tech.
📚 Read: How to Print Text Messages
Don’t feel overwhelmed by these terms. Text message backups are not only important, but they’re incredibly easy to do. If you’ve followed our guide, you can sleep easy knowing your text messages are safely and securely saved to something other than your phone.
Alice is a copywriter at SimpleTexting. When not teaching the world about the benefits of business texting, you can find her feeding family, friends and strangers with her latest baking experiment.
More Posts from Alice DoddThe 98% open rates of SMS campaigns mean that conversion rates are already sky high. But if you want to squeeze as much value out of text marketing as possible, follow these nine tips.
ReadApple’s iOS 26 changes how iPhones sort texts and it could affect how customers see your messages. Here’s what your business needs to know.
ReadStart a text marketing campaign or have a 1-on-1 conversation today. It's risk free. Sign up for a free 14-day trial today to see SimpleTexting in action.
No credit card required